Get started
This quickstart walks through the happy path from both sides of the product: creating a link in the Customer Hub, and creating one programmatically via the API. Pick the scenario that matches how you work.
- Customer Hub
- API
No code needed. You'll create a link, copy its URL, and confirm a successful payment — all from the Customer Hub.
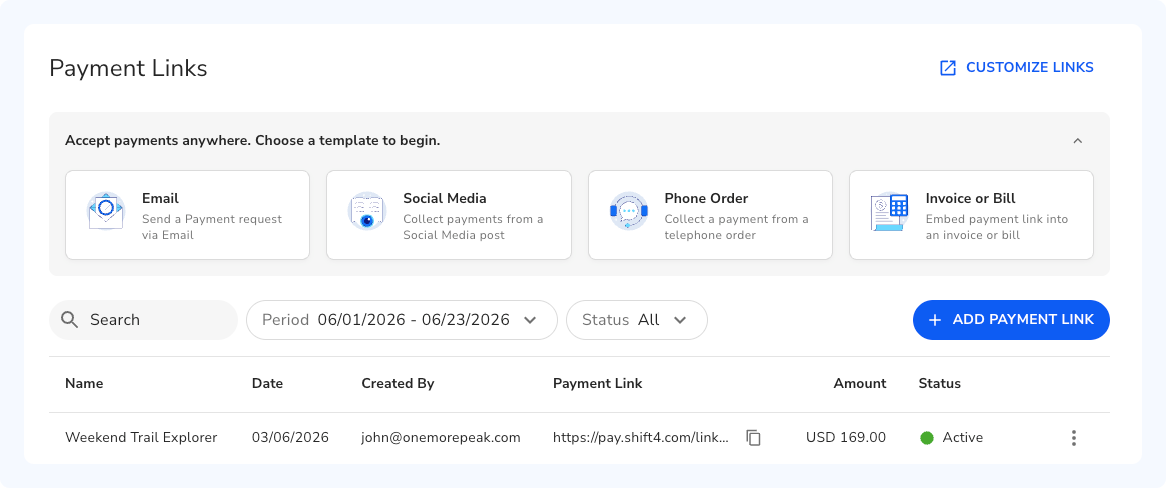
Open Payment Links in the Customer Hub.
Click "Add Link" or select a preset and the "Add Payment Link" page will appear.
Enter the name and amount. These fields are required.
Enter a description or omit the field by toggling the Include Description switch. The description is visible to the customer during checkout.
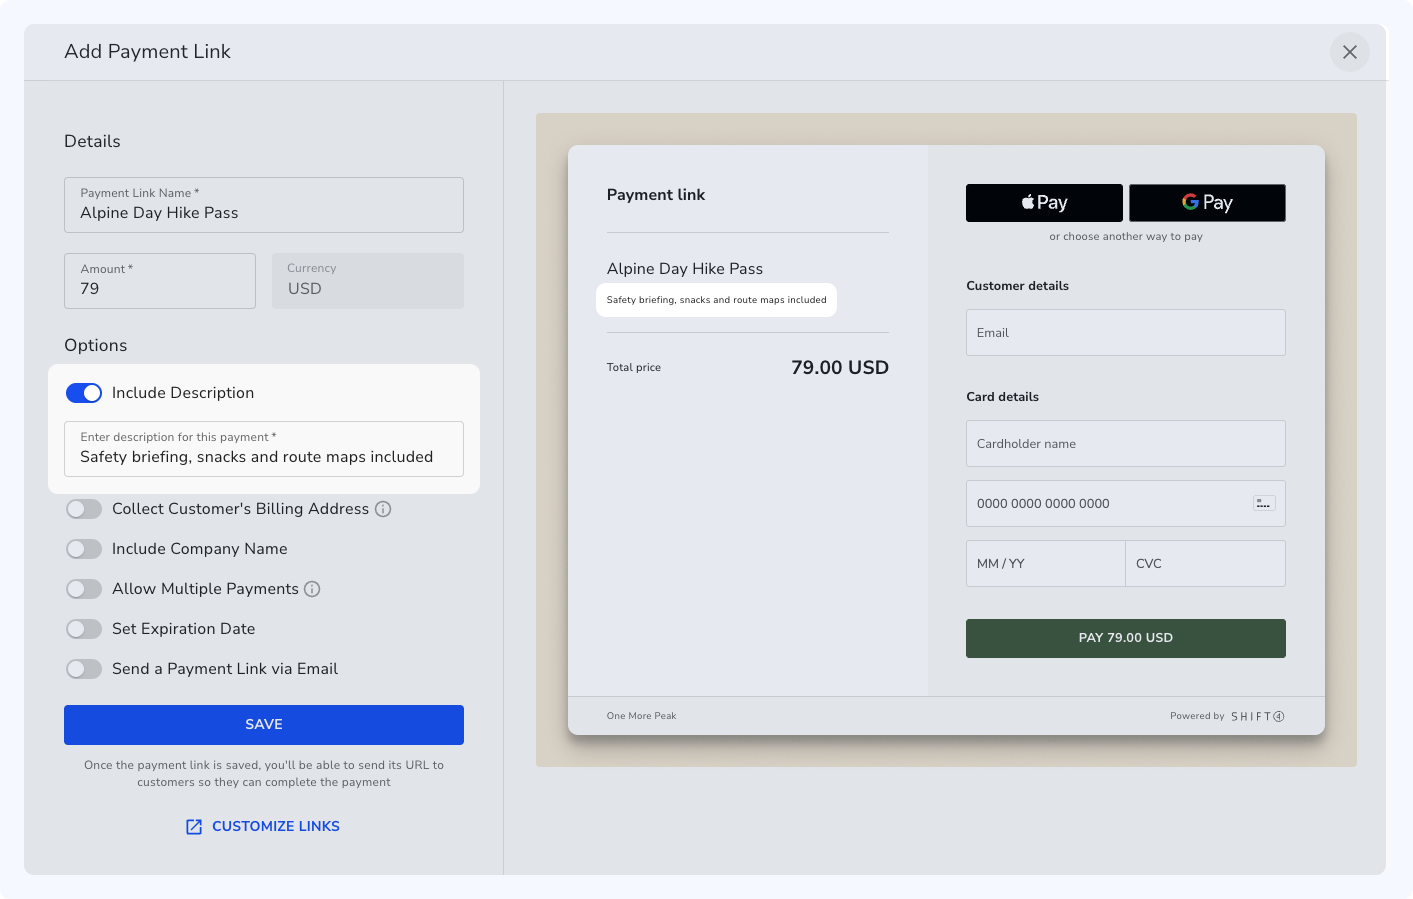
Save the link. You will see it on the Payment Links list. The link becomes active immediately.
Copy the URL from the newly created row's Payment Link column.
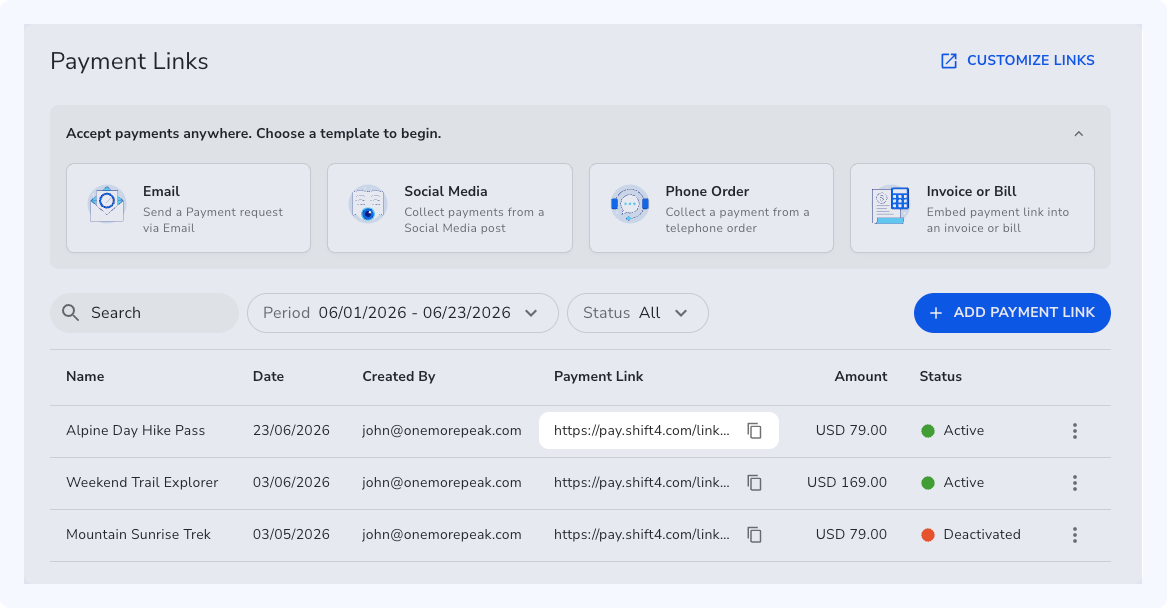
Share it with your customer via any channel — email, chat, anywhere you can paste a URL.
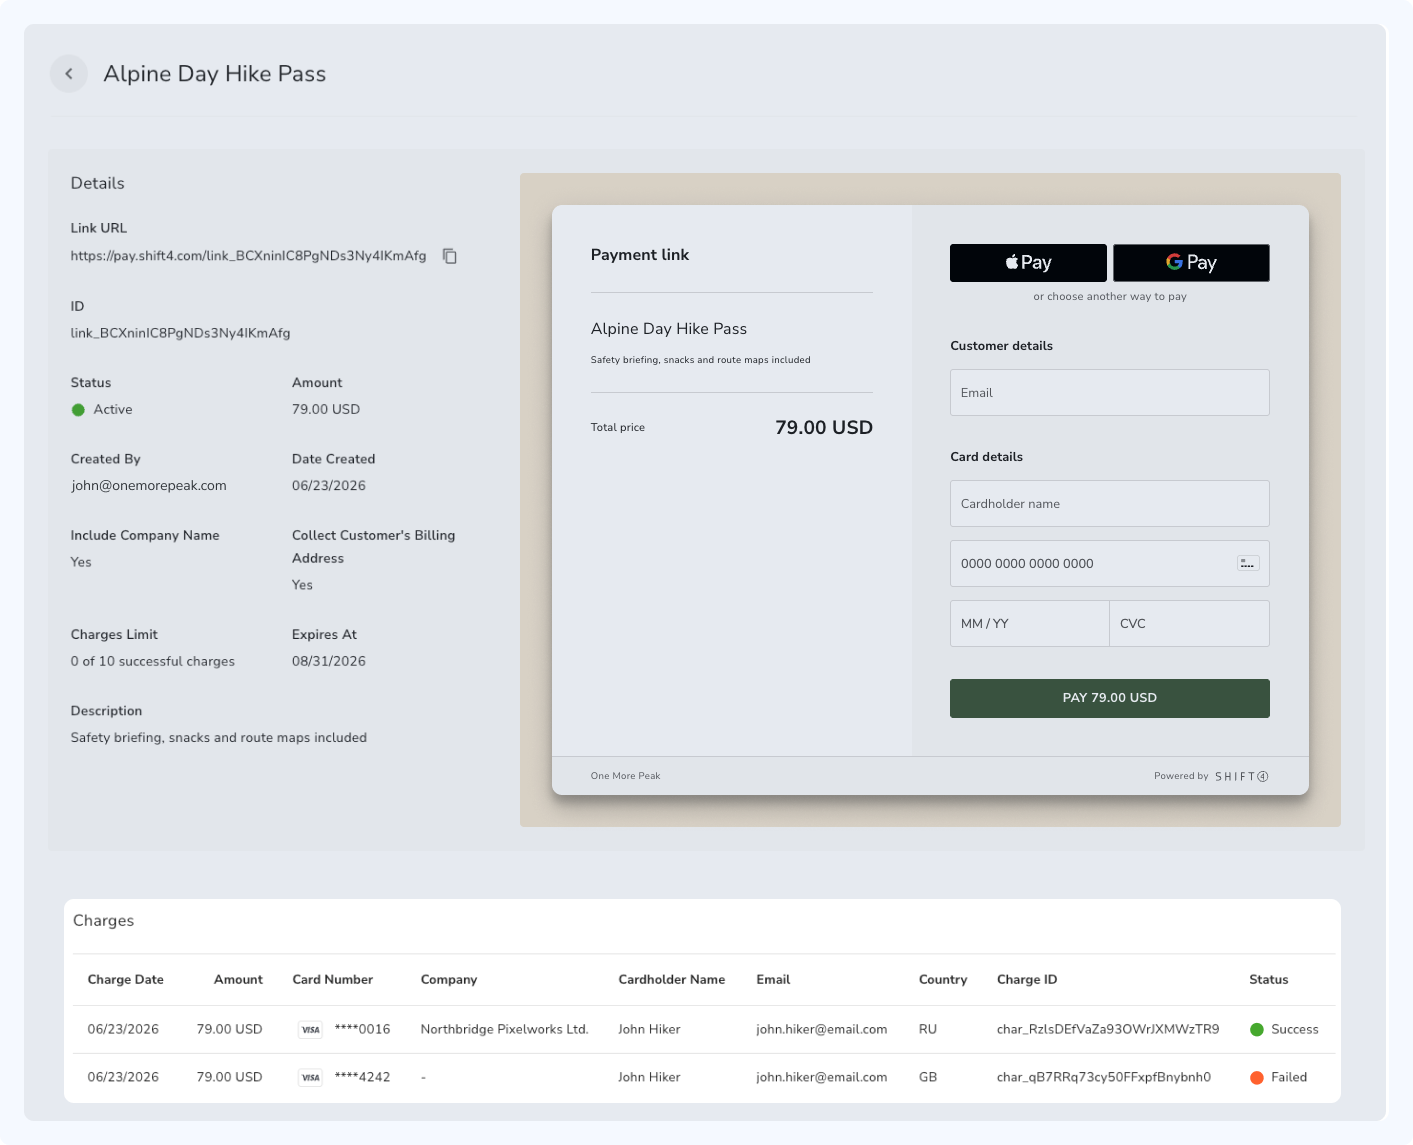
Confirm the payment once the customer pays. The link's detail view lists all charges.
If you need…
- If you need shipping/billing/custom fields → Create link
- If you need the link to expire, be scheduled, or be single-use/multi-use → Create link
- If you need to reconcile to an invoice/order → Monitor and reconcile
- If you need email notifications → Share
- If you need to set the return URL, payment methods, or page appearance → Customise and configure